- Home
- Photo Basics
- Autumn-woodland-photography-tips-for-beginners
Autumn Woodland Photography: A Gentle Beginner’s Guide
This page takes on a slightly different format, as in it takes you along on a walk I shared with my grandson. See if you pick up on the autumn woodland photography tips for beginners as you read through. You can then check against the Quick Settings Checklist at the end of the page.
I tugged at Sam's sleeve. He grunted as his thumb slipped from the phone screen. "Come on, the natural world has better graphics!"
He reached for his hoodie, fumbled with the zip, shooting me a sideways glance. "Huff!"
His screen dimmed as he shoved it into his pocket. My gaze lingered on its outline for just a moment. Perfect.
Later...
He trudged behind me, lost to the tiny, scrolling world in his palm.
A leaf, bright as a streak of paint, landed on my sleeve. I flicked it at him; it tickled his cheek, prompting a slight grin. "Hey, you're missing the good stuff."

Reading the Trail
A squirrel darted across the path, its tail a frantic question mark.
I squinted, tracing its zig-zagging path to a patch of upturned earth. My camera bag stayed zipped shut.
First, we observe the subject in its natural habitat, I thought, smiling.
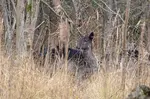
 Grey squirrel collecting acorns
"You remind me of walks with my Grandad Bill. Especially the day he gently stopped me, put a finger to his lips and looked left. A stag! The deer saw us and melted into the trees. Ever since, I use my eyes first. The camera can wait."
It wasn't long before I spotted something I couldn't resist sharing.
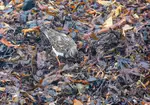
"Wait, look," I whispered, kneeling to trace the sharp edges of an impression in the mud. It wasn't a paw... but two perfect, cloven half-moons. A few feet away sat 3 small piles of glossy brown droppings.
Sam wrinkled his nose. "Ugh, what's that?"

"Evidence," I shrugged. "Dog paws are messy. These are too neat, too sharp. Almost like they were placed there on purpose."
He leaned closer, his eyes following the line of the prints.
As the quiet rasp of my camera bag's zipper drifted over to him, he took a half-step back to give me a clearer shot, his gaze fixed on the tiny tracks.
"Exhibit A," I muttered, making sure he heard. Then I turned to the droppings.
"You're not going to..." he began, as the shutter clicked.
"And exhibit B," I stated, as I stood up.
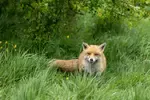
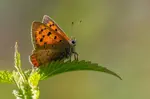
Taken by my neighbour on her Android phone in her back garden, showing examples of the critters that left the "evidence" above.
Give Your Subject Some Sky
"Here," I said, pulling my spare camera from the bag. "Your turn."
His eyes widened as he took it. "Wow. It's... heavy." His fingers fumbled with the unfamiliar ridges of the lens cap as I settled the leather strap around his neck, the weight seeming to anchor him to the spot.
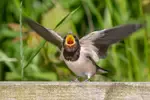
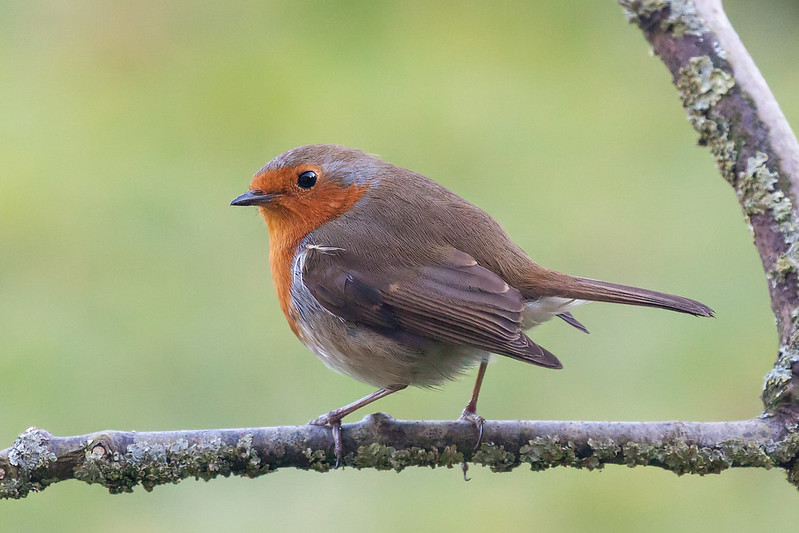
Just then, a robin landed on a branch nearby, a flash of orange against the muted woods.
"There," I whispered.
The camera's autofocus whirred. Click.
He lowered it with a grin, though his eyes remained on the bird. I leaned in to see the photo: a little fuzzy and dead centre.
"Again," I murmured. "Give him some sky."
He brought the viewfinder back to his eye, his stance more solid this time. His thumb adjusted the focus point. Another quiet click echoed in the woods. The smile that lit up his face said it all.
You Control What's Important
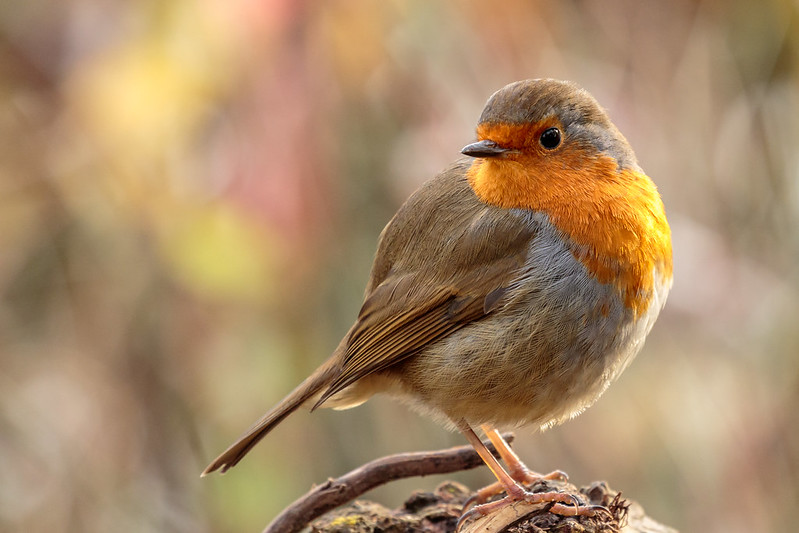
I showed him my shot of the robin.
"How did you make the background so... blurry?" he asked.
I adjusted the settings for him. "Now... take another picture," I murmured.
This time the branches behind the robin blurred into a soft wash of green.
"How'd you do that?" he asked leaning closer.
"Want to know something odd? The bigger the lens opening, the smaller the f-number. Doesn't that just sound daft? Bigger opening means a shallower depth of field, so the background blurs."
Sam nodded as if he understood, reaching for the camera eagerly.
"That's crazy! But I like what it does."
Tip 3 — You Control What’s Important (Background Blur)
To get clean subject separation and shallow depth of field in forests, combine distance, focal length, and aperture.

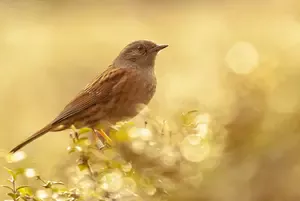
"Gloomy" Light is Actually Magic
As the sun began to dip, the light filtering through the trees turned thick and golden.
"Bit gloomy, isn't it?" Sam muttered.
"Gloomy? No," I said, a familiar thrill rising in my chest. "This is it. This is the magic."
I pointed to a tree trunk ahead, where the warm light was painting the bark honey-gold. "Watch. Just watch that tree. See how the light wraps around it? There are no hard edges anymore. It's just... soft."
Sam lifted the camera. The shutter clicked. He stared at the screen for a long moment, his expression shifting from doubt to quiet wonder.
"It looks... warm," he said, almost to himself. "Like, actually warm."
 Shot on iPhone 15 Pro Max · 11 Sep 2024
You Can Shape Light With Simple Tools
We came across a cluster of tiny toadstools.
"A hidden world," he whispered, crouching down.
He reached for the camera, but I stopped him. "Actually, the lens on there won't focus close enough for something this small. Use your phone instead."
Sam pulled out his phone, and brought up the phone app.
"Tap on the screen to focus on the fungi... Has the flower icon come up?'
"Yes, but it's too dark. Should I turn the flash on?"
"Goodness, no," I laughed softly. "Flash is a sledgehammer. It blasts all the details away and makes everything look flat and cold. But we can make our own light."
I held my white water bottle close to the fungi. "Anything white works. A napkin, a piece of paper... you don't need fancy gear."
The difference was stark. The golden light hit the bottle and spilled back into the mushroom's delicate gills, tracing details that had been lost to shadow.
"Wow, I didn't know my phone could do that!"


Capture Moments, Not Just Subjects
As we walked back, a gust of wind sent a spiral of golden leaves dancing down around us.
Without any prompting from me, Sam lifted his phone and tapped.
"Did you get it?" I asked.
He looked at the screen and grinned. "I got the feeling of it."
It wasn't the triumphant grin he'd had before. This was a quiet, almost private smile, and he lowered the phone slowly, his gaze still on the falling leaves.
He captured the blur of a single golden leaf as it spiraled down, the way the low sun ignited its edges, and the feeling of a whole season packed into one, windy second.
"I get it now," he said, his voice full of new excitement. "It's not about the thing, it's about the moment."
That was it. The secret I could never quite put into words. He wasn't just taking a picture of a thing; he was learning how to keep a feeling.
A Few Pages from My Notebook
"I got the feeling of it."
When my grandson, Sam, said that, I knew our walk had changed something. It reminded me that the most powerful lessons aren't about fancy gear; they're about learning to see.
That feeling is exactly why I write this site. If you'd like to start seeing the world a little differently, perhaps some of my other pages might help guide you on your way.
- On Making the Camera See What You See: This is how you start taking the pictures you see in your head. Learning how aperture, shutter speed, and ISO work together is the key. Here’s how I think about it.
- On How to Paint with Light: Remember how the sinking sun painted that tree trunk honey-gold? That's the light we chase. Here are my notes on how to find it, and how to use it to craft that same warmth in your own photos.
- On Reading the Story in the Woods: Those deer tracks were just the beginning. The world is full of quiet stories, and learning to name the birds is like learning to read a new, beautiful language. Here’s how I learned to translate it.
Quick Settings for Camera and Phone
Use these settings as a starting point for your photos. Tweak them as conditions change.
When to go: Early mornings or late autumn afternoons offer delicious, buttery light that slips between the trees, making them ideal for woodland photography.
Camera (quick settings):
- Starter: Set to Aperture Priority mode, your camera will take care of the shutter speed and you control how much is in focus. To help you concentrate on one thing, also set the ISO to automatic, but remember to set a higher limit to prevent noisy shots. Keep an eye on the shutter speed, ideally it should be shutter ≥ 1/(effective focal length in mm). This means if you have a 100mm lens keep the shutter speed at around 1/100s or higher).
- On windy days: Leaves can blur when caught by gusty conditions so you might want to change to Shutter Priority to have more control over sharp pictures.
- On dull days: Stick with aperature priority so you have control over how much light to let in. Don't go too far or it will be difficult to keep all of your subject sharp.
Try turning on IS (image stabilisation), putting your camera on a tripod, or bracing against a nearby tree trunk. If necessary increase the ISO.
Don't panic about the ISO level as modern cameras tolerate higher ISOs than those I used in the olden days, as my daughter used to say.
- White Balance: Set to WB: Cloudy, for warmer autumn colours.
- Shoot in RAW: RAW gives more latitude to fix colour/exposure in editing.
- Exposure Compensation: Use +0.3 to lift shadows; Use -0.3 for backlit leaves.
- Aperture Tip: Using f/4-f/5.6 will blur the background and isolate a single leaf, whereas f/8-f/11 will increase depth of field and keep a row of trees sharp from foreground to background.
- Shutter Speed Guide: Static subjects: ~1/125s – 1/250s; Moving subjects/gusts: ~1/500s; Small birds: 1/1000s or faster
- Use the rule of thirds grid for off-centre compositions.
- Wipe the lens with a microfibre cloth. Phone lenses can get smeared in use.
- Use the tele lens (2×/3×/5x) for tighter framing. Avoid zooming in with your fingers as it reduces image quality.
- Long press to lock focus and exposure, then drag the sun icon to brighten/darken.
- Hold with both hands and tuck in your elbows, or brace against a tree. Your 1-2s self-timer is another option or use a mini tripod.
Tips for Both
- Capture Action: Hold the shutter button down or use burst mode for action
Pro tip: A white bottle/notebook works as a reflector to lift shadow detail on fungi.
About the Author
I’m a wildlife photographer who learns on everyday walks. This site is my field notebook: practical photo tips, gentle ID help, and walk ideas to help you see more—wherever you are.
I write for people who care about doing this ethically, who want to enjoy the outing (not stress about the gear), and who'd like to come home with photos that match the memory — or at least the quiet satisfaction of time well spent.
Step Behind the Wild Lens
Seasonal field notes from my wildlife walks: recent encounters, the story behind favourite photos, and simple, practical tips you can use on your next outing.
Explore More Nature Walks, Wildlife and Photo Tips
How I Stopped Taking Boring Photos: My Guide to Low-Angle Photography
Feeling disappointed with your wildlife photos? This is the story of how I learned to use low-angle photography to go from boring shots to real connection.
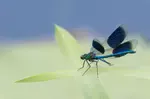
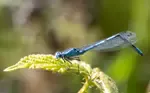
Dragonfly Pictures: Beautiful Close-Up Photos & How to Take Yours
Close-up dragonfly and damselfly images from UK nature walks — chasers, darters, hawkers and demoiselles. Where to find them, plus photography tips.
Camera Settings for Wildlife Photography: Shutter, Aperture & ISO
A step-by-step field guide to shutter speed, aperture and ISO—plus quick focus and histogram checks—so your wildlife photos feel like the moment.