- Home
- Photo Basics
Getting Into Wildlife Photography
Wildlife photography didn't start for me on safari. It started in a supermarket car park, with a blurry shot of a raptor circling over Corby. The photo was terrible — but something about those talons and that lazy, confident glide made me want to try again.
That's how it begins for most of us. Not with expensive gear or exotic trips, but with a moment where you think: I want to capture that.
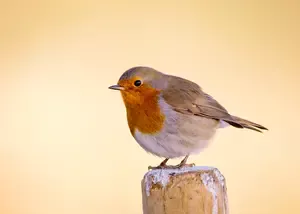
If you've had that feeling — watching a heron standing perfectly still, or a robin landing two feet away, or something you couldn't even name disappearing into a hedge — you're already further along than you think.
This guide covers everything you need to get going: settings, lighting, fieldcraft, composition, and the quieter skills that no camera can teach you.
You don't need to read it all at once. Pick the section that feels most useful right now, try it on your next walk, and come back for the rest when you're ready.
Jump to a section:
Why wildlife photography?
Because it changes how you see things. That's the honest answer.
Once you start paying attention, really paying attention, a walk stops being background noise and becomes something richer.
- You notice the way light catches a web.
- You spot the bird you've walked past a hundred times.
- You start to see patterns: where things feed, when they're active, what makes them bolt and what makes them stay.
You don't need rare species or dramatic locations. A pond, a garden feeder, a scruffy bit of woodland... there's more going on than you'd expect, and your camera gives you a reason to slow down and find it.
The photos are a bonus. The real reward is that the walk itself becomes more interesting.

Getting Started with Gear and Settings
If you're wondering what camera to buy, or how to make sense of the buttons on the one you've already got, these guides walk you through it without the jargon:
- Choosing a camera — what matters, what doesn't, and how to avoid overspending
- Lenses for beginners — what focal lengths actually mean in practical terms
- Essential accessories — the few extras that genuinely help (and the ones you can skip)
- Camera settings explained — aperture, shutter speed and ISO in plain English
- Prime vs zoom lenses — which type suits the way you shoot, and when each one earns its place in the bag
A Quick Settings Starter
A setup that works for most daytime wildlife:
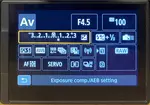
- Mode: Aperture Priority (marked Av or A on your dial) — it lets you control how blurry the background looks while the camera handles the rest
- Aperture: f/5.6 to f/8 — a good starting range for keeping your subject sharp
- ISO: Set to Auto, but limit it to 3200 or 6400 in your menu — this stops photos getting too grainy in lower light
- Focus: Continuous AF (called AF-C on most cameras, or AI Servo on Canon) — this tracks your subject as it moves
- Drive mode: Single shot or a slow burst — three frames per second is plenty when you're starting out
If any of those settings sound unfamiliar, or you're not sure where to find them on your camera, these will help:
- How to change your camera settings — a visual walkthrough for finding the dials and menus
- Shutter Priority mode — when Aperture Priority isn't enough and you need to freeze fast movement
- Why won't my camera focus? — simple fixes for the most common frustration beginners hit
Set these before you leave the house, then forget about them. Fiddling with settings in the field means missing moments. You can fine-tune later once you've got a few outings under your belt.
And when it comes to packing, think "corner shop run" rather than expedition. Camera, one lens, a full battery and an empty memory card. That's it. The lighter your bag, the longer you'll stay out — and the more you'll notice.
And if your photos are coming out darker than expected, have a look at how to get brighter photos in-camera — it covers the settings and field techniques that fix dark shots without needing to edit afterwards.
Why Lighting Makes All the Difference
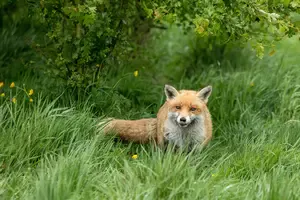
You could have the best lens, the cleverest settings, and the most cooperative fox in the county — but if the light isn't working for you, the photo won't land. Light is what gives a wildlife image its mood, its depth, and its warmth.
The good news? You don't need to buy better light. You need to learn when to show up and what to look for.
Golden Hour (The Wildlife Photographer's Happy Place)
The hour after sunrise and the hour before sunset are when everything comes alive — the light, the colour, and often the wildlife too.
Golden hour light is warm and low. It wraps around your subject, picks out texture in feathers and fur, and casts long, gentle shadows that add depth to a scene. Even an ordinary bird on a fence post looks different when the light is doing something beautiful behind it.
The practical bit: check your sunrise and sunset times the night before, and aim to be in position fifteen minutes early. I've missed more than one magical moment by being five minutes late. Wildlife doesn't wait for you to find the right spot.
Learn more about shooting in the Golden Hour
Backlighting (A Bit of Drama)
When the sun is behind your subject rather than behind you, something interesting happens. You get a rim of light around the edges: a bright outline on feathers, fur or whiskers that separates the animal from the background and adds real drama.
It works beautifully on crisp mornings and near sunset, when the light is already low and warm. The trick is to use spot metering (your camera manual will show you where to find it) so the camera exposes for the animal rather than the bright sky behind it. Without that, you'll get a silhouette — which can also be lovely, but it's not always what you're after.
Mist and Fog (Soft, Moody and Atmospheric)
On misty mornings, the world goes quiet. And so do your photos. Mist softens backgrounds, hides distracting clutter, and wraps everything in a gentle, diffused light that's hard to get any other way.
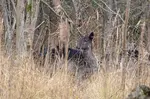
Wildlife tends to be more active at dawn, which is exactly when mist is at its best. A heron standing in still water, half-hidden by fog, or a deer appearing out of nothing — these are the photos that make people stop scrolling.
One practical note: mist loves to cling to glass. Bring a couple of lens cloths and keep them somewhere dry. You'll use them more than you expect.
When to Put the Camera Down (Midday Sun)
Not all daylight is created equal. The middle of the day (roughly 11am to 2pm in summer) is the hardest time to get wildlife photos you'll be happy with.
Harsh overhead sun creates strong shadows under beaks and bellies, washes out colour, and flattens everything into a two-dimensional look. It's also when many birds and animals retreat to shade, so there's less to photograph in the first place.
If you find yourself out at midday, use the time to scout locations, watch behaviour patterns, or practise with your settings on easy subjects. Save the real photography for when the light softens again.
Overcast Days (Your Secret Weapon)
Don't be disappointed by cloud cover. Overcast skies are genuinely useful. The clouds act like a giant diffuser, spreading soft, even light across everything. You won't get the warm glow of golden hour, but you also won't get those harsh shadows that ruin a good shot.
Overcast light is particularly good for capturing detail and texture — feather patterns, bark, leaves, insects. It also adds a moody, atmospheric quality to woodland and wetland scenes.
If the forecast says grey, go anyway. Some of the most satisfying wildlife photos are taken under flat skies.
Two more conditions worth knowing about
- Low light photography — when dawn, dusk or deep woodland shade pushes your camera to its limits, these techniques and settings help you still come home with something sharp
- Photography in the rain — don't let wet weather put you off. Rain brings atmosphere, behaviour, and light you won't get on a dry day. Here's how to protect your gear and make the most of it
In the Field — Your First Outing
You've read about settings and lighting. You know where you're heading. Now you're there, camera in hand — what do you actually do?
The answer might surprise you: nothing. At least, not straight away.
The Five-Minute Pause
When you arrive at your spot, resist the urge to start shooting immediately. Find somewhere comfortable — a bench, a hide, a patch of grass — and deliberately do nothing for five minutes.
Listen. Hear the calls, the splashes, the rustling in the undergrowth. Let your eyes adjust. Let the birds and animals around you settle back into their routine after you walked in.
Those five minutes do two things. They tune your senses to what's actually happening around you (rather than what you hoped to find). And they tell the wildlife you're not a threat — you're part of the scene now.
It feels like wasting time. It isn't. It's the single most useful habit you can build.
The Three-Sighting Rule
Once you've settled in, try this approach before reaching for the camera:
First time you see a behaviour — a bird landing on a particular branch, a duck diving in the same spot — watch it. Notice what happens.
Second time — look for the pattern. Does it come from the same direction? Does it pause in the same place? Is there a rhythm to it?
Third time — now lift the camera. You'll know where to point, roughly when to press the shutter, and you'll be calm rather than scrambling.
This observe-recognise-photograph pattern works whether you're watching a heron fishing, a robin hopping along a fence, or squirrels chasing each other around a tree. It turns reactive snapping into something more deliberate, and your keeper rate goes up immediately.
Start with the Easy Crowd
Don't put pressure on yourself to photograph anything rare or dramatic on your first few outings. Ducks cruising around a pond, swans doing their stately thing, pigeons on a railing, garden birds at a feeder — these are your training ground.
They're predictable. They're tolerant of people. And they'll teach you timing, focus, and patience without the heartbreak of a once-in-a-lifetime bird that flew off before you found the shutter button.
Success on your first outings isn't a portfolio shot. It might be getting a reasonably sharp duck, realising how much your hands shake when you're excited, or spotting a tiny behaviour you'd normally walk straight past. That's not failure — that's exactly how this works.
Composition — One Idea at a Time
You don't need to memorise every composition "rule" before your next walk. In fact, trying to think about all of them at once is a quick way to freeze up and miss the moment entirely.
Instead, pick one idea per outing and play with it:
Rule of thirds
Imagine your frame divided into a grid of nine equal boxes. Instead of centring the bird or animal, try placing it where the lines cross. It feels odd at first, but it gives your photos a more natural balance.
Leading lines
Look for natural lines that guide the eye towards your subject: a branch, a path, a riverbank, a fence line. They pull the viewer in and give the image a sense of direction.
Natural framing
Use leaves, grass, branches or even gaps in a hedge to frame your subject at the edges of the shot. It adds depth and draws attention to where it matters.
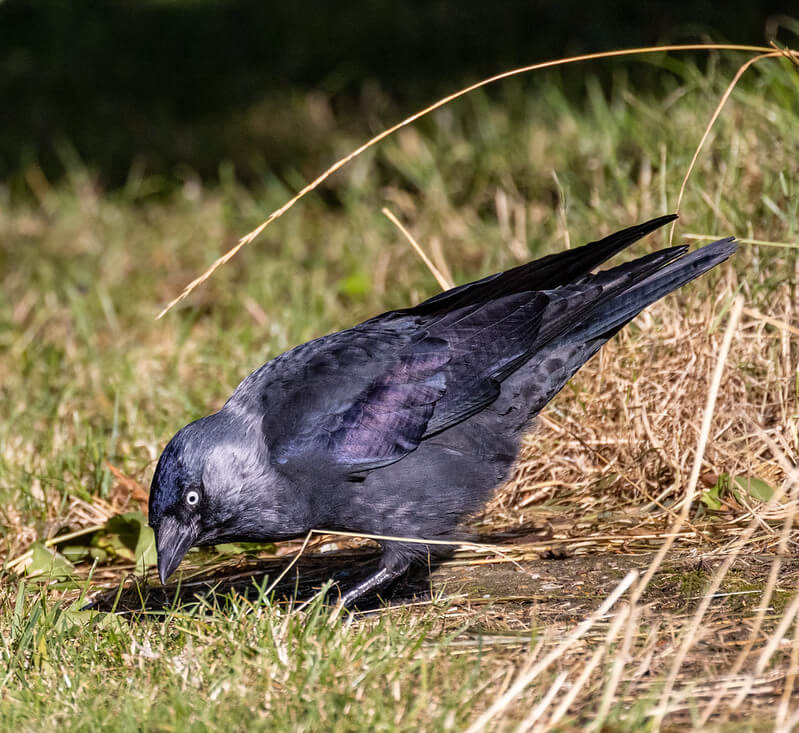
The curved grass stem creates a natural frame above the Jackdaw — look for these moments
Include the habitat
Get low — changing your shooting height transforms wildlife photos more than almost any other single change. If you want to see the difference it makes, have a look at my guide to low-angle photography.
Once you're comfortable with the basics, try something "wrong" on purpose — centre the subject, crop tighter than you normally would, tilt the camera slightly. The point isn't to follow rules; it's to change how you see.
Vary What You Capture
While you're building your confidence, try mixing up the types of shots you take on each outing:
- Wide habitat shots that show the animal in context — these often reveal behaviour and tell a story
- Close details — a feather pattern, a wet beak, the texture of bark where a bird was perching
- Portraits — the classic head-and-shoulders wildlife shot, when your subject obliges
Switching between these keeps you engaged, builds different skills, and means you'll come home with more variety — even from a quiet day.
Beyond the Gear — Skills You'll Need
Having the right equipment and understanding your settings is a fantastic start. But the photographers who come home with photos they're genuinely pleased with are usually the ones who've built a few quieter skills alongside the technical ones.
Patience
This might be the wildlife photographer's most valuable tool, and it costs nothing.
Animals work to their own timetable, not yours. You might wait half an hour for a kingfisher to return to its perch, or sit for forty minutes watching a spot where you're fairly sure something will appear. Some days it does. Some days it doesn't.
The trick is to enjoy the waiting rather than endure it. Watch what's happening around you. Listen. Notice the light changing. These are the moments where your observation skills sharpen. And when something does appear, you'll be ready because you've been paying attention, not checking your phone.
I once went back to the same spot four times to photograph great crested grebes during their courtship display. The first three visits, the timing was wrong. The fourth time, everything lined up. The photo was worth the patience — but honestly, so were the quiet mornings that came before it.
Observation
The more time you spend watching wildlife, the more you start to see. Where does that robin always land? What time do the ducks move to the far bank? Which branch does the woodpecker favour?
These aren't trivia: they're the intelligence that puts you in the right place at the right time. Understanding animal behaviour helps you anticipate what's about to happen, choose better positions, and press the shutter a beat before everyone else.
You can build this with a bird identification guide, learning to recognise species by shape, movement and call rather than relying on colour alone.
One habit worth starting early: keep a nature journal. It doesn't need to be elaborate — a pocket notebook or your phone's notes app will do. Jot down what you saw, where, what time, what the weather was doing. Note the things you couldn't identify so you can look them up later.
Over time, your notes become a personal field guide. You'll start to see patterns — which birds turn up at which times of year, which spots are best in which conditions — and that knowledge feeds directly into better photographs.
Respect for Wildlife
This is non-negotiable
The welfare of your subject always comes first — ahead of the photo, ahead of the social media post, ahead of everything. Use your lens to get closer, not your feet. If an animal changes its behaviour because of your presence, you're too close. Back off.
Be especially careful around nesting sites and animals with young. Stick to paths and hides where they exist, and follow the Countryside Code even when you're tempted to nip past a barrier for a better angle.
The good news is that ethical fieldcraft often leads to better photographs. A relaxed animal behaves naturally. A stressed one doesn't. If the bird has settled, forgotten you're there, and gone back to what it was doing — that's your real win.
Practice
Like any skill, wildlife photography improves with repetition — and the best practice is the kind you can do often without it feeling like a chore.
The birds at your garden feeder, squirrels in the local park, ducks at the nearest pond. These are your classroom. They'll teach you tracking, focus, timing and composition without the pressure of a special outing.
Many of my favourite photos were taken within walking distance of home. There's no pressure, no long drive home feeling disappointed, and you can experiment freely because the same subjects will be there tomorrow.
Parks, ponds and local reserves are full of everyday wildlife that's perfect for building confidence. Walk slowly. Stop often. Let the wildlife come to you.
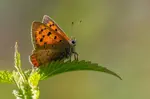
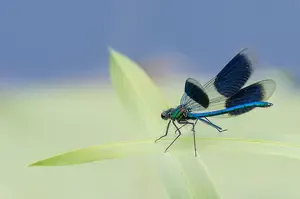
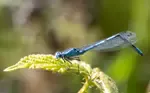
If you want a specific subject to practise on, butterflies and dragonflies are brilliant — they're colourful, they return to the same spots, and they'll teach you patience and close-up technique without needing a long lens:
- Butterfly photography — macro tips, best camera settings, and how to get close
- Dragonfly photography — where to find them and how to capture the detail
And don't overlook zoos and wildlife parks as a practice venue. You can work on focus techniques, anticipation, and composition without worrying that you'll never see that species again. The animal will still be there tomorrow if you muck it up today — and that takes the pressure off completely.
Where to Go From Here
If this page feels like a lot, don't try to absorb everything at once. Pick one thread that interests you and follow it:
Learning to See and Identify
Being able to put a name to what you're looking at makes every outing more rewarding. Start with the common birds you already half-recognise, and build from there:
- How to Identify Wild Birds — by shape, movement and behaviour, not just colour
- Woodland Birds — what to look and listen for among the trees
Before you head out
- Nature Walk Checklist — what to take, what to notice, and how to make the most of a short trip
After the Trip — Reviewing Your Photos
You're back home, cup of tea in hand, card full of photos. The temptation is to zoom straight to 100% magnification and declare everything a disaster. Don't.
The Two-Pass Review
First pass — emotion. Flick through everything quickly and mark anything that makes you smile. Not technically perfect — just the ones where something feels right. A nice moment, an unexpected angle, a look in the eye. These are your keepers for now, however soft the focus might be.
Second pass — learning. Go back through more slowly. This time, look at the ones that didn't work and ask yourself one question: what would I do differently next time? Not twenty things. One thing. Maybe you'd use a faster shutter speed. Maybe you'd have waited two more seconds. Maybe you'd have moved a metre to the left.
That one observation is worth more than an hour of YouTube tutorials, because it came from your own experience with a specific photo you remember taking.
The Long View
Every few months, go back to your earliest shots. Don't cringe — compare. Notice what's changed in how you see, not just how sharp things are. You'll find you're composing more deliberately, reading light better, and making decisions faster than you realise.
One day you'll look at that first slightly-out-of-focus robin and recognise it for what it was — not a failure, but the moment you stopped thinking about wildlife photography and started doing it.
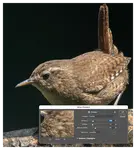
Editing your photos
Post-processing doesn't have to mean making things look unnatural. A light crop, a small brightness adjustment, and a gentle tweak to contrast can close the gap between what you saw and what the camera captured, without losing the honesty of the moment.
- Editing your wildlife photos — a practical, light-touch approach
Keep Exploring
Each of these guides digs deeper into a topic covered on this page:
Shutter speed, aperture and ISO — a step-by-step field guide with quick focus and histogram checks
When to shoot, camera settings, composition tricks and tips for capturing warm cinematic light
How changing your shooting height transformed my photos — and how it'll transform yours
Macro tips, best camera settings, and how to get close to these brilliant practice subjects
Learn to recognise species by shape, movement and behaviour — not just colour
A practical, light-touch approach to closing the gap between what you saw and what the camera captured


Step Behind the Wild Lens
Seasonal field notes from my wildlife walks: recent encounters, the story behind favourite photos, and simple, practical tips you can use on your next outing.
Explore More Nature Walks, Wildlife and Photo Tips
Camera Settings for Wildlife Photography: What to Set and When
Stop guessing your camera settings. A simple 3-step workflow helps you choose the right settings for any wildlife situation, from birds in flight to dusk.
A Histogram in Photography - How to Read and Interpret It
Learn the vital role of a histogram in photography to achieve correct exposure, so you can adjust for underexposed or overexposed shots with confidence
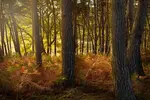
Woodland Photography Tips for Beginners: A UK Autumn Walk
Simple woodland photography tips for beginners — camera settings, composition and phone-friendly ideas from a real autumn walk in the UK.


Copyright © 2018- naturewalkswithcarol.com All rights reserved
Home. | About Me | Contact Me | Blog | Privacy Policy