- Home
- Photo Basics
- Accessories
- Photos of Dragonflies
Dragonfly Photos: A Gallery & Guide from UK Nature Walks
On warm summer days, when the trees are in full leaf and the birds are harder to spot, the air suddenly fills with dragonflies and damselflies.
Those brief, whirring fly-bys are your invitation to start taking photos of dragonflies that show off their “aerial acrobat” personalities.
With their rapid turns, shimmering wings, and sudden pauses on reeds, they’re some of the most rewarding - and challenging - wildlife subjects you can choose.
This guide walks you through practical photography techniques so you can consistently capture sharp, detailed dragonfly images rather than hit-and-miss snapshots.
We’ll start with when and where to look, from the first adults appearing around May in the East of England to the peak summer swarms over ponds and slow streams.
Once you can reliably find good habitat, you’ll be ready to work on approach, composition, and timing to catch those split-second moments in flight.
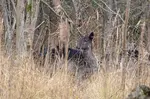
Its not always successful
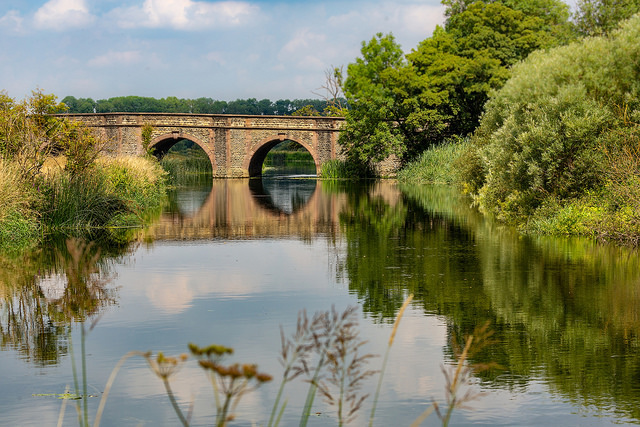
 The photograph above was the highlight of a walk that didn’t go as planned.
We never actually made it to the new nature reserve that day; after driving past the entrance twice, we gave up and pulled into Oundle instead.
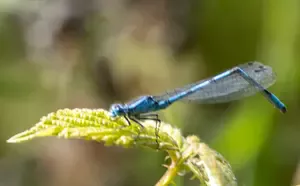
A slow wander down to the River Nene turned into an unexpected chance to take some of my favourite photos of dragonflies, including the damselfly perched just above the water in the shot above.
What could have been a wasted trip became the highlight of my week behind the camera.
Moments like this are why I always keep my kit ready for dragonflies whenever the weather is warm and there’s water nearby.
Where to Take Photos of Dragonflies
 River Nene, Oundle, Northants
To find dragonflies and damselflies, start at fresh water habitats like rivers, lakes, and ponds.
Don't just focus on the water's edge. Look in nearby meadows and wastelands. These areas can hide these beautiful insects.
After exploring local spots for years, I know where to find different species and when they appear.
My husband often joins me on nature walks. However, when I focus on dragonfly photography, he finds it a bit dull. He jokingly tells other walkers, "We don’t travel at miles per hour, but hours per mile!"
Searching for small creatures takes time. You need to scan high and low, not just at eye level.
Better Backgrounds for Dragonfly Photography
Dragonflies are colourful and interesting to look at, but their beauty can get lost in a busy or mismatched background. Choosing the right backdrop ensure it enhances rather than detracts from your subject.
This sometimes involves bending, stretching, twisting and turning until you find the best position to take your picture from.
A patch of stinging nettles may attract Banded Demoiselles, but a pretty flower makes a better photograph.
Since I work at close distances, most backgrounds will be out of focus. However, any colour or tone variation will stand out. I aim to keep the background as even as possible.
Shifting just a little can change the background completely, improving the picture. Patience is key; as I wait for the insect to land in a better spot.
The background colour can make a difference when taking photos of dragonflies and damselflies.
A green background with purple flowers creates a pleasing look. These colours are from the same side of the colour wheel and blend well.
On the other hand, orange contrasts with blue, making the second picture more vibrant.
Both backgrounds work well. Which one do you like more?
I believe natural backgrounds are the best option, though they are not always available. Wooden fences and other structures are less distracting than messy plants, but they lack beauty.
By paying attention to the backdrop, you can ensure your dragonfly photos are both beautiful and engaging. With this foundation in place, let’s focus on the next challenge: getting close enough to capture every intricate detail.
 Ruddy Darter on picnic table
 Large Red Damselfly on rope fence
 Common Blue Damselfly with out of focus flower in background
 Common Blue Damselfly with even background
How To Take Close-Up Photos Of Dragonflies
I have two favorite lenses for taking dragonfly photos. My choice depends on how close I can get to the insects, but I usually keep both in my camera bag.
I prefer the Canon 100-400mm telephoto lens, often using it with a 1.4x extender. This setup allows me to capture the dragonflies without getting too close. The lens focuses at just under 1 meter, which is great for skittish insects that fly away when I approach.
If you have a Nikon camera, you can also use a Nikon 1.4x extender.
Both photos of dragonflies below were taken with the 100-400mm lens. The dragonflies were perched over water, and I wanted to keep my feet dry!
 Four Spotted Chaser
 Scarce Chaser
If you're wondering how to take macro photos of dragonflies, investing in a macro lens is a great starting point.
For detailed close-ups, the Canon 100mm L macro lens is lighter and easier to carry than a large telephoto. To capture great shots, stay quiet and move slowly towards the insects.
Be careful not to bump the perch with your camera. Trust me, I learned this the hard way.
The Canon extender does not work with this lens. However, I use a more affordable option from Kenko. This allows me to maintain distance from my subject while still getting good images.
If a dedicated macro lens is out of your budget, try using extension tubes with your standard lens for close-ups or a smartphone macro attachment as a starting point.
Be careful when using shorter lenses as the closer you stand the more likely it is to create a shadow on your subject. Not only can this spoil your photograph but it can also scare of the dragonfly.
 Common Darter taken with the 100mm macro lens and convertor
 Common Darter taken with the 100mm macro lens
Keeping The Camera Steady for Sharp Photos
To take clear photos of dragonflies keeping the camera steady is very important. A tripod can be difficult to use when they land close to the ground.
I have two options for stability. First, I can use a bean bag to support the camera and lens on any nearby surface.
However, my favourite choice is the Platypod. This is a metal base that holds a tripod head. It has four adjustable legs that help level the camera or can be removed completely.
This setup makes it easier to capture sharp images of dragonflies.
Perfecting Focus for Sharp Dragonfly Photography

One of the most important dragonfly photography techniques is learning how to manage depth of field for sharp focus on your subject.
I won’t get too technical, but when your lens is close to a subject, less of the area in front and behind it will be in focus. This is known as Depth of Field.
I use two main methods to address this issue:
- I choose a small aperture, like f8 to f16, to increase the depth of field when there is enough light.
- I position myself so my lens is parallel to the insect's body. This reduces the distance from front to back that the insect occupies.
Sometimes, everything aligns perfectly, and I capture not just one insect in focus, but three!
Ideally, I would remove the twig on the left side of the photo by adjusting my position. However, when photographing dragonflies and damselflies, moving things can disturb them, making this difficult.
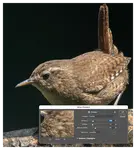
You might find when focusing that your camera locks onto the background rather than the dragonfly. Switching to a single point autofocus mode or even manual focus may help.
 Hairy Dragonfly - although taken at F8 I was at the wrong angle and therefore the end of its abdomen is out of focus, spoiling the photograph
 Of course rules are meant to be broken! The focus here is on the head and it doesn't matter that the tail is out of focus.
Freezing the Motion of Dragonflies in Flight
When photographing dragonflies and damselflies, remember they move quickly!
To freeze their action, I use a shutter speed of at least 1/500 second, or even faster. Fortunately, they often appear on bright, sunny days, allowing me to select a wide enough aperture for good exposure.
Capturing these insects in flight is more challenging.
I keep the shutter speed above 1/2000 second to stop the action. However, even this speed sometimes struggles to freeze the motion of their wings, as seen in the first photo of the Migrant Hawker below.
 Migrant Hawker in flight at 1/2000sec
 Migrant Hawker from behind at 1/2000sec
Dragonflies create stunning action photos, especially when they are mating.
Earlier, I mentioned getting low to capture dragonfly images. I don’t recommend the method I used for one particular shot.
I saw a pair of Common Darters on the riverbank. I took a few pictures and then moved in closer. While focusing on them, I stepped into a hole and fell!
Fortunately, I landed on the ground, not in the water. After checking my camera for damage, I looked back at the dragonflies. They were still there, and from my low angle, the sun lit them up beautifully. It turned out to be a happy accident.
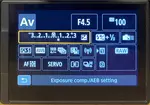
For this shot, I used a shutter speed of 1/250 second, which was fast enough. This let me set the aperture to f16, keeping both dragonflies in focus. The distant riverbank remained nicely blurred.
When I reviewed the photo on my Mac, I noticed a "bokeh ball" around the top dragonfly, created by a blurred circle of light on the water. I was thrilled!
Sometimes, the best shots come from unexpected circumstances, so keep trying, even if things don't go perfectly!
 Common Darter pair
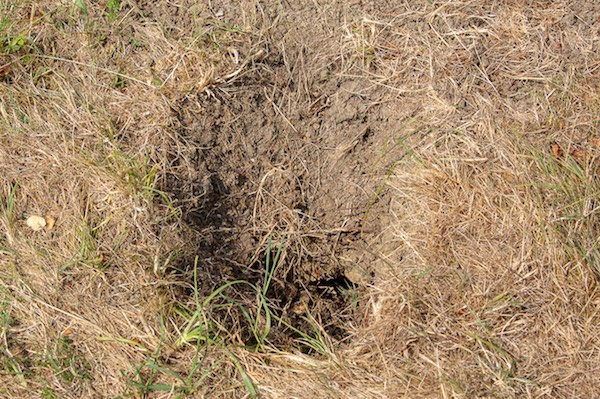 The hole I accidentally put my foot into!
Dragonflies and damselflies are voracious predators. They hunt with great skill. The damselfly shown below was enjoying a fly for breakfast at Barnwell Country Park.


Common Blue Damselfly at breakfast
In conclusion, photographing dragonflies and damselflies offers unique challenges and rewards. With the right techniques and a bit of patience, you can take beautiful photos of dragonflies and damselflies.
Each photo of a dragonfly is a moment frozen in time—an opportunity to appreciate their delicate beauty and incredible agility.
Whether you’re just starting or perfecting your craft, the journey is as rewarding as the images themselves.
Further Reading
Related Photography Tips
Butterfly Photography - Find out what equipment you need and how to use it to take beautiful butterfly photos.
Low Angle Photography - Low angle photography gives a different perspective to your wildlife pictures - check the results!
Why Won't My Camera Focus? - How I discovered what was wrong when trying to focus on damselflies
Related Walks and Locations
Paxton Pits Nature Reserve - A mecca for dragonflies including the Norfolk Hawker even though its in Cambridgeshire
Grafham Water - a Site of Special Scientific Interest (SSSI) in Cambridgeshire, on a virtual stroll around the reservoir.
Welches Dam - Welches Dam is a Fenland wonderland where you can view huge numbers of overwintering birds from ten comfortable hides.

I've spent over 30 years walking and photographing UK wildlife, with work featured in Canon EOS Magazine and a Wildlife Trusts calendar. I still learn something new on most outings.
This site is my field notebook full of photo tips, help on identifying what you see, and how to decide where to walk. About Me.
Step Behind the Wild Lens
Seasonal field notes from my wildlife walks: recent encounters, the story behind favourite photos, and simple, practical tips you can use on your next outing.
Explore More Nature Walks, Wildlife and Photo Tips
How To Sharpen Wildlife Photos: (Photoshop, Lightroom, Topaz)
Make wildlife photos crisp. Learn how to sharpen wildlife images in Photoshop, Lightroom, and Topaz Sharpen AI, fix motion blur, and avoid halos.
Butterfly Photography Tips: How to Photograph Butterflies Up Close
Learn how to photograph butterflies with simple camera settings, lens tips and fieldcraft advice for sharp close-ups on UK nature walks and in the garden.
Wildlife Photography in the Rain: A Practical Wet-Weather Guide
Don't let rain put you off. How to protect your camera, adjust your settings, and capture the stunning atmosphere that only wet-weather walks can deliver.


Copyright © 2018- naturewalkswithcarol.com All rights reserved
Home. | About Me | Contact Me | Blog | Privacy Policy