- Home
- Photo Basics
- Golden Hour Photography
Golden Hour Photography: How to Capture Warm Light (Settings & Tips)
Golden hour photography lets you catch birds, mammals, and landscapes in that warm, honey-coloured light around sunrise and sunset, when everything looks calmer and more alive.
You don't need pro gear or heavy editing to get those dreamlike shots. You just need to show up for this short window of light.
What this guide covers
- How to win the argument with your pillow (and why five minutes is enough to start)
- Choosing a first subject that guarantees you something to photograph
- Two simple paths: keeping everything sharp, or making one subject stand out
- What to do when the photo on your screen doesn't match what you saw

The first step: show up before you optimise
I know the feeling.
The alarm goes off while it's still dark, and your warm bed feels like the most logical place in the world. Trading it for a slim chance of catching the light can feel foolish.
I fought that exact battle in a little cottage in Bamburgh, Northumberland. My family slept soundly. But my passion, and a little stubbornness, pulled me out of bed. I quietly slipped into the pre-dawn quiet.
That's your first hurdle. Not f-stops, not composition. Just winning the argument with your pillow.
Try this first: Don't start with a huge trip. Just step outside your own back door for five minutes as the sun rises or sets. Leave your camera inside. Just watch. See how the light touches the edge of a leaf or warms the face of a brick wall.
We have to prove to ourselves that we can show up. That small win gives us the confidence to try something more.
Your best first subject: choose something that waits for you
As I walked through the sleeping village of Bamburgh, doubt flickered through me. What if I get to the beach and the light is flat? What if I walk all this way for nothing? I had let this fear win in the past, but this day was different!
That's why I chose the castle as my subject.
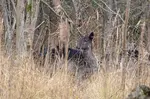
This is my secret to building confidence, especially when you're just starting. Wildlife is unpredictable. Birds don't show up on command, and deer don't wait for good light. If you only want to find a specific animal, you set yourself up for potential disappointment.
But a castle? A castle stays put.
When you choose a static, reliable subject:a landmark, a unique tree, a pier, a bridge, you remove half the risk. You guarantee yourself something to photograph. You can focus solely on the light and on how it transforms a subject you know will wait for you.
Think of it as your first step. Master the light on a subject that can't run away. Then, later, you can take that confidence and go looking for wildlife, knowing you already have the skills to capture the moment if it arrives.
Good first subjects for golden hour
- A landmark or ruin
- A lone tree
- A jetty or pier
- A church tower
- A gate or fence line
- A viewpoint over water or open fields
Planning tip: Use a free app like The Photographer's Ephemeris to see exactly where the sun will rise and set in relation to your chosen landmark. This turns a vague hope into a concrete plan, telling you precisely where to stand and when to be there.
You're no longer just a hopeful guesser. You're the architect of your shot.
Pick your path: landscape or wildlife detail
When I reached the beach, I found another photographer setting up his tripod. We nodded and shared that quiet understanding of why we were both there. We weren't rivals. We were pilgrims.
As the sun finally broke, it struck Bamburgh Castle. The old stones glowed, and the light reflected in the saltwater pools the tide had left behind. It was more beautiful than I'd hoped.
I stood there, looking at that vast scene, the castle, the sand, the sea, and I wanted to capture its epic scale. But the most powerful golden hour shots don't just show a scene. They make you feel it. The key is guiding the eye.
And the way you guide the eye depends on what kind of photo you want to take.
Path one: keeping the whole scene sharp
For the castle, I wanted everything to look sharp and in focus, from the wet sand at my feet to the castle walls in the distance.
To achieve that, I needed to choose a narrower aperture, then use a slower shutter speed to let in enough light. Now I understood why the other photographer had lugged his tripod with him.
When to use this: Castles, trees, beaches, piers, lakes, broad views. Anywhere you want the whole frame to feel sharp.
- Use a narrower aperture (higher f-number)
- Expect less light, so shutter speed will slow down
- Support the camera on a tripod, wall, or bag if you can
Path two: making one subject stand out
That sharp, all-encompassing view was the right choice for the castle. But what do you do when the story isn’t epic? What do you do when it’s small and intimate, and you want to pull one tiny subject out of a messy background?
That's a completely different challenge, and it needs a completely different tool. Let me take you from that beach at golden hour to an early morning in my own garden.
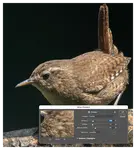
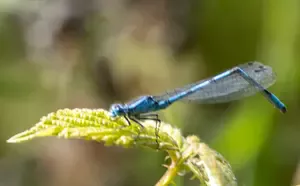
I was trying to photograph a small bird, a Dunnock, on our hedge. The photo was a mess. The branches and leaves behind it distracted the eye so much that the beautiful little bird disappeared into the clutter. My photo didn’t give the viewer a clear hero.
To make that Dunnock the star of the show, I needed to do the exact opposite of what I did for the castle. Instead of making everything sharp, I needed to blur the background into a soft, glowing wash.
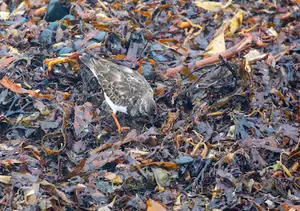
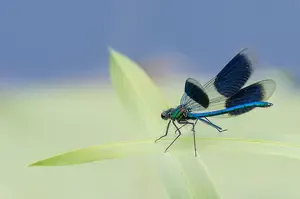
When to use this: A bird on a hedge, a flower head, a perched insect, any small subject in clutter.
- Use a wide aperture (a low f-stop number like f/2.8 or f/4)
- This creates a shallow depth of field, throwing the background out of focus
- Your subject pops with clarity while the clutter melts away
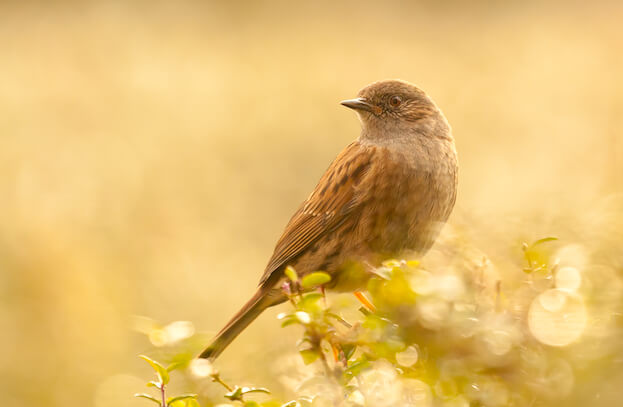
A wide aperture threw the background of this Dunnock out of focus, letting the bird become the clear hero of the shot
Nailing this feels like pure magic. You realise you can now tell the camera, “Look here. This is the important part.” You’ve stopped just taking a picture and started creating a portrait.
When the back of the camera looks disappointing
I remember looking at the photo of Bamburgh Castle on the back of my camera.
In the glowing pre-dawn light, my eyes could see both the colour in the sky and the details on the ancient stones. But on my little screen, I could only see a sky that looked okay and a castle that had sunk into a dark silhouette.
I felt that pang of disappointment every photographer knows.
The camera hadn't captured the full feeling of the scene in front of me. Maybe my camera wasn't good enough?
I now realise that wasn't the problem. I just had to learn how to work around that limitation.
The secret was to capture more information than appeared on the back of the camera.
The fix: If your camera has it, switch the image quality to RAW. A RAW file gives you the full, uncompressed story from your camera’s sensor. A JPEG only gives you the summary. A RAW file keeps the detail in those bright highlights and dark shadows, and gives you amazing flexibility later.
This frees you from the frustration of getting it perfect in-camera. During editing, you can bring your memory of the scene back to life, so the final image reflects what you actually saw.
The magic isn't locked in the computer
That four-mile walk in Bamburgh left my feet sore, but it rewarded me deeply. I had the RAW file, and my memory card safely held the full story of that morning’s light.
Back at the computer, I knew the photo on my screen was just the starting point. I still had one final, most personal step to take: gently edit the image until it truly matched the incredible memory I held in my mind.
That's a story for another day.
For now, you’ve done the most important work. It’s not about sliders or software. It’s about showing up. The golden hour doesn’t lock its magic away in a computer. It invites you outside every day.
So please, set that alarm. Go chase the light. The results may thrill you, but I promise the feeling of just being there will change you.
Further reading
Still struggling with dark or blurry scenes?
Low Light Wildlife Photography
Capture stunning wildlife images between dusk and dawn
Wildlife Photography in the Rain
Tips on keeping you and your gear dry while still getting the shot
Want to edit golden hour photos naturally?
A gentle intro to editing that keeps your photos looking real
Want another beginner-friendly outing to try?
A Winter Sunrise at the Nene Washes
Discover the magic of RSPB Nene Washes in winter
Autumn Woodland Photography Tips
Tips for your next woodland photography walk
About the Author


Step Behind the Wild Lens
Seasonal field notes from my wildlife walks: recent encounters, the story behind favourite photos, and simple, practical tips you can use on your next outing.
Explore More Nature Walks, Wildlife and Photo Tips
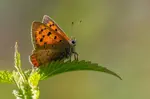
Butterfly Photography Tips: How to Photograph Butterflies Up Close
Learn how to photograph butterflies with simple camera settings, lens tips and fieldcraft advice for sharp close-ups on UK nature walks and in the garden.
Getting Into Wildlife Photography: A Beginner's Guide
Camera settings, golden hour lighting, fieldcraft and composition for beginners. A nature photographer's guide with real examples from the field.
Camera Settings for Wildlife Photography: What to Set and When
Stop guessing your camera settings. A simple 3-step workflow helps you choose the right settings for any wildlife situation, from birds in flight to dusk.


Copyright © 2018- naturewalkswithcarol.com All rights reserved
Home. | About Me | Contact Me | Blog | Privacy Policy