- Home
- Photo Basics
- Accessories
- Butterfly Photography
Butterfly Photography Tips: How to Photograph Butterflies Up Close
If you're just starting out with a camera and want a subject that practically teaches you to see light, colour, and detail, butterfly photography is your perfect training ground.
Up close, those “ordinary” garden visitors turn into living stained glass, with patterned wings, curling proboscises, and surprisingly fuzzy bodies.
In the UK, spring Brimstones and summer Fritillaries offer endless chances to practice, but turning them into sharp, well-composed images takes more than luck.
In this beginner’s guide, we’ll walk through the gear, settings, and fieldcraft you need so you can confidently choose butterflies as your next subject.
 Getting close reveals the beauty - like on this Small Copper butterfly.
Getting Started: The Right Approach
Successfully photographing butterflies isn't just about the camera; it starts with your approach.
More than almost any other wildlife subject, butterfly photography demands patience. They rarely pose on command, so waiting quietly for them to settle is necessary — and persistence pays off.
Equally important is building your knowledge of their behaviour and habitats. You’ll improve your hit rate dramatically by learning:
- When different species fly
- What flowers they favour for nectar
- Where they are likely to rest or bask
Patience and knowledge put you in the right place at the right time. Having suitable gear then helps you actually capture the moment when it appears.
Next, let’s look at the equipment that will help you get those stunning close-ups.
Essential Equipment for Butterfly Photography
Camera Options: What Works Best?
You can photograph butterflies with many types of camera, but as a beginner, it helps to know what each one is good at.
Interchangeable Lens Cameras (DSLR & Mirrorless)
An Interchangeable Lens Camera (ILC) – whether DSLR or Mirrorless – generally gives you the most flexibility and control.
Their advantages:
- You can mount specialised lenses (macro or telephoto, covered in the next section).
- You have full access to manual settings (aperture, shutter speed, ISO) to control focus, motion blur, and background blur.
If you’re keen to dive into close-up techniques and want room to grow, an ILC is usually the best long-term choice.
Smartphones: The Camera You Already Have
That said, don’t discount your smartphone.
Modern phones often include:
- Dedicated macro modes
- Surprisingly capable optical/digital zoom
- Tap-to-focus for precise focusing on the butterfly
In good light, and with careful technique, you can absolutely capture lovely butterfly images. Smartphones shine for:
- Convenience – they’re almost always with you
- Spontaneous sightings – quick shots when you weren’t planning to go shooting
Choosing What’s Right for You
In the end, your decision comes down to:
- Budget
- How deep you want to go into close-up techniques
- Whether you prioritise maximum creative control (ILC) or everyday portability (smartphone)
Both options can work for beginner butterfly photography – it’s about choosing the tool that fits how you like to shoot.
Lens Choice: The Critical Factor
Choosing the right lens is crucial for getting close to butterflies. Each option trades off magnification, working distance, image quality, and cost a little differently.
True Macro Lens
(e.g., 90mm, 100mm, 105mm)
Best for maximum detail and true close-up work
- Magnification:
- Excellent often 1:1 or greater
- Distance:
- Short-Medium (you’ll be fairly close)
- Quality:
- Excellent
- Versatility:
- Good – doubles as a portrait lens
- Cost:
- Medium-High
Telephoto Lens
(e.g., 100-400mm with close focus)
Best for: Skittish butterflies and creamy blurred backgrounds.
- Magnification:
- Good close-up (about 1:4)
- Distance:
- Medium–long (you can stay further back)
- Quality:
- Very Good
- Versatility:
- Excellent – great for general wildlife
- Cost:
- Medium-High
Close-Up Filter / Close-Up Lens (Screw-on Diopter)
(Screw-on Type / Diopter)
Best for low-cost experimentation with lenses you already own.
- Magnification:
- Increases – depends on filter strength (+1 to +10)
- Filter strength:
- Usually +1 to +10 (higher = more magnification)
- Distance:
- Very Short
- Quality:
- Variable – can soften the image
- Edge Sharpness:
- Often softer, especially with strong filters or wide apertures
- Autofocus:
- May slow or hunt – manual focus often helps
- Versatility:
- Low - mainly for close ups
- Cost:
- Low
Extension Tubes
Hollow tubes, no optics)
Best for: Boosting magnification on existing lenses without adding glass.
- Magnification:
- Adds significant magnification (varies by tube length/lens)
- Distance:
- Reduced – you must get closer than usual
- Quality:
- Generally good (no extra glass in the path)
- Versatility:
- High – works with many lenses
- Cost:
- Low-Medium (much cheaper than macro lens)
- Light Loss:
- Yes - Requires more available light or higher ISO/slower shutter.
- Focusing:
- Yes - Can be slower/trickier (less light for AF; very shallow DoF)
Together, these options let you choose between maximum quality (macro), more working distance (telephoto), or budget-friendly add-ons (filters and tubes), depending on how serious you are about close-ups and how close you’re comfortable getting.
Macro Lenses (e.g., 90-105mm)
Macro lenses are specialist tools designed for high-quality, high-magnification close-ups — they don’t just “focus closer,” they’re built for it.
Here’s what sets them apart from regular lenses:
-
True life-size magnification
A macro lens can achieve 1:1 magnification (or more), meaning a butterfly’s eye or wing pattern can fill the frame in-camera, rather than relying on heavy cropping. -
Optimised for close focusing
The optics are designed to stay sharp at very close distances, where many standard lenses start to struggle or lose contrast. -
Ideal focal length for butterflies
A macro around 90–105mm hits a sweet spot by giving you: - High magnification for frame-filling shots
- A comfortable working distance so you’re not right on top of the butterfly
That working distance – the gap between the front of your lens and the subject – is crucial. With a 90–105mm macro you can fill the frame without crowding the butterfly, reducing the chance of spooking it compared with shorter lenses or more basic close-up options.
 A dedicated macro lens (like the 100mm used here) allows for high magnification, revealing the intricate beauty and texture of subjects like this tiny Dingy Skipper.
Telephoto Lenses (e.g., 100-400mm)
Telephoto zooms are ideal when you’re dealing with nervous, skittish butterflies and don’t want to creep in too close.
Many modern telephoto lenses – such as 70–300mm, 100–400mm, or 150–600mm – offer surprisingly good close-focusing performance. They usually don’t reach true 1:1 macro magnification (more like 1:4 or 1:3), but they can still fill a large part of the frame, especially with bigger species.
The real advantage isn’t just magnification – it’s distance:
- You can shoot from several feet away.
- You’re less likely to spook butterflies as you approach.
- You can observe and photograph more natural behaviour because you’re not right on top of them.
The long focal length also brings two big bonuses:
- Compressed perspective – backgrounds appear closer and more unified.
- Beautifully blurred backgrounds (bokeh) that make the butterfly stand out cleanly against soft colour.
In short, telephoto lenses trade extreme close-up detail for comfort and working distance, making them a powerful option when your subjects are too shy for a true macro lens.
 Taken with a 100-400mm telephoto lens - good magnification and working distance, plus nice background blur (Comma butterfly).
Close-up Filters / Diopters
If you’re on a strict budget or just want to test the waters with butterfly close-ups, screw-on close-up filters (also called diopters or close-up lenses) are the cheapest way to start.
They:
- Attach to the front thread of a lens you already own (kit lens, telephoto, etc.)
- Act like a magnifying glass, letting the lens focus closer than normal
- Come in different strengths (e.g. +1, +2, +4 – higher numbers = more magnification)
This lets you move physically nearer to the butterfly so it fills more of the frame, without buying a new lens.
There are trade-offs:
- You’ll have a very short working distance, so it’s easier to spook skittish subjects.
-
Image quality can drop a little, especially:
Towards the edges of the frame
With stronger filters or stacking more than one - You may see minor optical aberrations compared with a dedicated macro or high-quality telephoto.
Even with those compromises, close-up filters are:
- Very affordable
- Lightweight and compact
- A simple way to explore close-up butterfly photography before committing to a more expensive lens.
Useful Accessories for Butterfly Photography
You don’t need a bag full of extras to photograph butterflies. Your camera and lens do most of the work. A few simple add-ons just make life easier by helping with stability and light.
Stability: Tripod, Monopod, or Beanbag
Most of the time you’ll be hand-holding, especially with active butterflies. But a bit of support can help when:
- You’re using smaller apertures (slower shutter speeds)
- Light is poor
- You want pin-sharp detail at high magnification
Useful options:
- Lightweight tripod – best for more static situations
- Monopod – extra support while still moving around quickly
- Small beanbag – handy for low-angle shots on the ground
Pick one lightweight solution you’ll actually carry, not all three.
Remote Shutter Release or Self-Timer
At high magnifications, even pressing the shutter can blur an image.
You can reduce vibrations by:
- Using a cable or wireless remote, or
- Switching on your camera’s 2-second self-timer
You don’t have to buy anything – many cameras already have a timer built in.
Circular Polarising Filter (CPL)
On bright, sunny days a CPL can:
- Cut glare and reflections on wings and leaves
- Deepen colours and improve saturation
It’s optional, but handy if you often shoot in harsh midday light.
Small Reflector or Diffuser
Light control doesn’t need to be complicated.
- A small foldable reflector (white is usually best) can gently brighten shadows under the butterfly.
- A diffuser (a small translucent panel) between the sun and the subject can soften harsh light, reducing strong highlights and deep shadows.
These are easier to use if you have someone to hold them, so treat them as a bonus, not essential kit.
Bottom line: start with your camera, lens, and maybe one stability aid. Add a filter or reflector later if you find yourself fighting glare or harsh light.
Understanding Behaviour: The Key to Better Butterfly Photos
Butterfly photography can look chaotic – tiny jewels zig-zagging around, landing wherever they please.
In reality, butterflies follow repeatable patterns. Once you understand their behaviour, your photos depend less on luck and more on knowing what they’re likely to do next.
Instead of chasing them, focus on why they land where they do and how they typically move. That knowledge lets you:
- Anticipate moments
- Be in the right place
- Have your camera ready before they settle
Pay particular attention to these common behaviours, which often give you the most predictable photo opportunities:
Basking – Warm-Up Time
On cooler sunny mornings, many species (e.g. Wall Browns, Speckled Woods in sunspots) will:
- Rest with wings held open and flat
- Sit on paths, leaves, or logs
This is often your best chance for a static, detailed shot where you can take your time with composition and focus.
Nectaring – Feeding Focus
When butterflies are feeding on nectar-rich flowers (Tortoiseshells on Buddleia, Blues on Thyme, Skippers on Knapweed), they’re:
- Preoccupied
- Relatively still
Watch which flowers are getting the most visits, then pre-position yourself near a likely landing spot instead of roaming randomly.
Patrolling – Repeated Routes
Some males (such as Gatekeepers along hedges or certain Fritillaries in clearings) fly set routes through a territory, looping back again and again.
If you identify a patrol route, you can:
- Predict where they’ll pass
- Wait at key points where they may briefly pause or fly close enough for a shot
Resting / Roosting – Quiet Moments
During cloudy spells, rain, or towards dusk, butterflies seek shelter, often:
- Clinging motionless beneath leaves or flowerheads
- Hiding deep within grasses
Roosting butterflies offer chances for careful close-up work and more unusual angles you’d struggle to get in bright, active conditions.
Feeding Quirks – Not Always Flowers
Knowing preferred food sources is crucial, but it’s not always about pretty blooms.
Britain’s Purple Emperor, for example, famously ignores nectar. It seeks minerals from:
- Damp ground
- Tree sap
- And less savoury options like animal dung or even sweaty hikers!
Without understanding that behaviour, you’d never think to look for it in those places.
Learning these species-specific habits takes patience and quiet observation, but it changes everything. Instead of chasing random flutters, you start working with patterns – turning butterfly photography from a game of chance into a rewarding, largely predictable pursuit.
Where To Find Butterflies: Targeting Habitats
 The magnificent British Swallowtail butterfly relies entirely on fenland habitats in the Norfolk Broads.
Butterflies don’t turn up just anywhere. Most species are closely linked to:
- Specific habitats, and
- Certain larval food plants and nectar sources
If you match the species you want to see with the places and plants they rely on, your chances of finding them rise dramatically.
Here are key UK habitats and the butterflies they’re tied to:
Gardens, Parks & Allotments
Don’t underestimate your local patch. Areas planted with nectar-rich flowers such as:
- Buddleia (“Butterfly Bush”)
- Verbena bonariensis
- Sedum, Lavender, Marjoram
…are magnets for species that thrive around people and cultivated plants, including:
- Peacock
- Red Admiral
- Small Tortoiseshell
- Comma
- Various Whites
Wildflower Meadows & Grasslands
Unimproved grassland, flower-rich meadows, and even grassy road verges provide:
- Larval food plants for many species
- Plenty of nectar and open areas for basking
Typical species here include:
- Meadow Brown, Gatekeeper, Ringlet
- Common Blue, Marbled White, Skippers
Woodlands and Hedgerows
Sheltered, sunny rides, clearings, and mature hedgerows suit butterflies whose food plants and behaviour depend on woodland structure:
- Speckled Wood – often defending sunspots along paths
- Brimstone – linked to Buckthorn food plants in hedges and woodland edges
- White Admiral in mature woodland
- High in oak woods, the elusive Purple Emperor
Chalk & Limestone Downs
These specialised grasslands support butterflies whose caterpillars use very particular plants, such as:
- Horseshoe Vetch
- Rock Rose
Here you’ll find specialist species like:
- Chalkhill Blue
- Adonis Blue
Wetlands and Fens
In wetland and fen habitats, plant restrictions are even tighter. For example:
- The British Swallowtail is now restricted to fens in the Norfolk Broads, where its sole larval food plant, Milk Parsley, grows.
Other Options: Butterfly Houses & Wildlife Gardens
For reliable sightings and close-up practice, especially on cooler days, you can also visit:
- Butterfly houses (often at zoos or garden centres)
- Wildlife centres with specially planted butterfly gardens
These places mimic natural plant–habitat combinations in a compact, accessible space. However, they may not be native British Butterflies and are likely to be hot, so dress accordingly.
Across all these examples, the pattern is the same: habitat + host plants + nectar sources = specific butterflies. Once you start looking for that triangle instead of “random butterflies,” finding subjects to photograph becomes far more intentional.
Camera Settings for Butterfly Photography
Once you have suitable equipment and know where to find butterflies, camera settings become the difference between a nearly shot and a keeper.
Because you’re working very close to small, fast-moving subjects, the settings that work for general wildlife often don’t work here. Depth of field behaves differently, and you need to adjust.
(If Aperture, Shutter Speed, and ISO are new concepts, check my main guide on how to change camera settings first.)
Aperture and Depth of Field
In close-up butterfly photography, aperture is usually the biggest technical challenge because it controls depth of field (DoF) – the zone that appears acceptably sharp.
At normal wildlife distances, you can often shoot:
- Fairly wide open (e.g. f/4, f/5.6)
- And still get most of the animal in focus
Up close, that changes dramatically.
Why close-ups need different apertures
When you focus very close:
- DoF becomes extremely shallow
- A wide aperture (like f/2.8 or f/4) might leave only the eye sharp and the rest of the butterfly soft
 Visualising Depth of Field: This diagram illustrates how focusing distance dramatically affects the zone of sharpness (depth of field). Close focus results in a narrow DoF, while distant focus allows for a deeper DoF.
To keep more of the butterfly sharp, especially if it’s angled towards you, you usually need to stop down.
Good starting points for perched butterflies:
- f/8 to f/11 – often a sensible balance of DoF and light
- f/16 – for maximum DoF if the light allows
Even then, at high magnification, DoF can be just millimetres. Tiny movements or wing angles can still push parts (like antennae or wing tips) out of the sharp zone.
 Even at f/16, the very shallow depth of field at close range means the Red Admiral's proboscis is sharp, but the tips of its rear antennae are slightly soft.
When you might still use wider apertures,
You don’t always have to stop down heavily. Wider apertures (around f/4–f/5.6) can work well when:
- The butterfly is further away (DoF naturally increases)
- You want a soft, artistic look that isolates just the head/eye against a blurred background
The key is recognising that close-up work changes the rules: apertures that felt “safe” for general wildlife can give you paper-thin focus on butterflies, so you need to think more deliberately about depth of field.
 Using a wider aperture (f/6.3 here) isolates the Marbled White's head and legs against a very soft background, but sacrifices sharpness on the wingtips.
Shutter speed: Motion is Magnified Up Close
While aperture controls depth of field, shutter speed controls motion — and in close-up butterfly photography, every tiny movement is magnified.
At high magnification:
- A small wing flick becomes a big blur.
- A slight breeze moves the whole subject.
- Your own hand shake is more obvious than in general wildlife shots.
To keep that motion under control:
- Aim for at least 1/250s for perched butterflies, even if they look still.
- If the butterfly is fluttering, feeding, or you’re using a longer lens handheld, push higher: 1/500s–1/1000s (or more if needed).
The main exception is early morning golden hour, when butterflies are cold and inactive:
- You can sometimes use slower shutter speeds.
- But a tripod (or other support) becomes very important to counteract your own movement.
If freezing motion is your priority, consider using Shutter Priority mode so the camera automatically adjusts aperture/ISO to maintain your chosen speed.
ISO: Supporting the Shutter Speed You Need
ISO doesn’t cause blur directly, but it decides whether you can keep that fast shutter while still exposing correctly.
As a starting point:
- Use the lowest ISO you reasonably can (e.g. ISO 100–400) in good sunlight.
However, close-up magnification makes you far more sensitive to motion blur, so don’t be afraid to raise ISO when you need to:
- To hold 1/500s+ in dappled woodland light
- To combine a smaller-aperture-(f/8–f/16) with a fast shutter on overcast days
Modern cameras often handle ISO 800, 1600, even 3200 well enough that:
A sharp photo with a bit of noise is almost always better than a clean but blurry one.
Think of ISO as your safety net that lets you maintain the shutter speed close-up work demands, instead of being forced into blur-prone exposures.
Focusing Techniques for Butterflies
At close range, depth of field is tiny, so getting focus right is critical. Small errors that wouldn’t matter in general wildlife shots can ruin a butterfly close-up.
Think in two modes:
- Autofocus for speed and convenience
- Manual focus for maximum precision
Using Autofocus
AF works well, especially for perched butterflies in good light.
- Use Single Point AF to place the focus point exactly on the eye or head. Letting the camera choose points will often grab a wing edge or background instead.
- For more active butterflies, switch to Continuous AF (AF-C / AI Servo) so the camera keeps adjusting focus as they move. It won’t always keep up with erratic flight, but it helps with small shifts and short hops.
Switching to Manual Focus (MF)
For static subjects at high magnification, manual focus often gives the most precise control.
- Set the lens to MF.
- Look through the viewfinder or use magnified live view on the LCD.
- Gently rock your body very slightly back and forth to move the focus plane through the butterfly, taking the shot when the key detail “snaps” into sharpness.
If your camera offers Focus Peaking (highlighting sharp edges in a bright colour), turn it on in MF mode — it’s extremely useful for confirming that critical areas are truly in focus.
Aligning the Butterfly with Your Focus Plane
With limited DoF, angle matters as much as focus point.
Whenever possible:
-
Try to keep the camera sensor parallel to the most important part of the butterfly:
The wings, if they’re open
The body line, if the wings are closed - This maximises how much of the butterfly falls inside the thin sharp zone you’ve focused on.
Combining the right focus mode with good alignment makes it far more likely that your close-up shots are sharp where it counts.
Drive mode (Single vs. Burst for Butterlies)
Drive mode controls how many frames your camera takes when you press the shutter — and with butterflies, that choice can mean the difference between one so-so shot and a perfect wing position.
Think of it this way:
- Single shot for calm, controlled composing
- Burst/continuous for anything that might change suddenly
When Single Shot Works Best
Use Single Shot drive mode when:
- The butterfly is perched and relaxed
- You have time to fine-tune composition and focus
- You’re working carefully with depth of field and background
Here, you’re aiming for one precise frame, not a spray of images. Single shot encourages you to slow down and think about:
- Exact focus point
- Background clutter
- Wing angle and pose
When to Switch to Burst/Continuous
Butterflies can take off without warning. Continuous (Burst) mode dramatically boosts your chances of catching those split-second moments.
Switch to Low or High Speed Burst when:
- The butterfly looks restless (wing-flicking, shuffling)
- You expect takeoff or landing
- Two butterflies are interacting or chasing each other
- You’re tracking a moving subject through flowers or along a hedge
Holding the shutter down for a short burst lets you capture:
- Different wing positions mid-flight
- Tiny head movements during nectaring
- Subtle changes in pose that you’d never time manually
You don’t need to machine-gun every scene — just anticipate action and flick into burst mode before it happens.
Composing Your Butterfly Photos
Sharpness and good settings matter, but it’s composition that makes a photo feel intentional rather than lucky. A few simple tricks can instantly improve your butterfly shots.
Here are practical ideas you can try straight away:
1. Use the Rule of Thirds
Instead of centring the butterfly every time:
- Imagine a tic-tac-toe grid over your frame.
- Place the head or eye on one of the intersection points.
- Leave space in front of the butterfly for it to “look into”.
This small shift usually makes the image feel more balanced and natural.
 Rule of Thirds in action: This Small Tortoiseshell is positioned off-centre, leaving negative space on the right for a more balanced feel and allowing the butterfly 'room to breathe' in the frame.
2. Include the Environment (Wider View)
Not every photo has to be an extreme close-up.
- Step back slightly or use a slightly wider focal length.
- Show the flowers, grasses, or leaves the butterfly is using.
This tells more of a story: the butterfly in its world, not just a floating specimen.
 Including the surrounding foliage shows the Silver-washed Fritillary within its natural habitat.
3. Control the Background
What’s behind the butterfly can make or break the photo.
Aim for clean, uncluttered backgrounds that don’t fight for attention. You can often improve things by:
- Changing your angle – move a little left/right or up/down to swap messy detail for smooth foliage or sky.
- Using a wider aperture (e.g. f/4–f/5.6) to blur distractions.
- Getting closer (if the butterfly tolerates it), which naturally throws the background more out of focus.
Always take a second to ask: Is anything behind the butterfly pulling my eye away?
 A clean composition: Choosing an angle with a distant, uniform green background, combined with careful focus, makes this Green-veined White and the flower pop.
4. Get Down Low (Change Your Perspective)
Most people shoot from above, which often flattens the scene.
Instead:
- Drop your camera to the butterfly’s eye level, or even slightly below.
- This creates a more intimate, engaging perspective.
- It can also simplify the background against the sky or distant foliage.
A small change in height can completely transform the feel of the image.
 Getting down low for a different view! This eye-level perspective of a Purple Emperor on the ground creates a more intimate portrait and helps separate the butterfly from its surroundings. Definitely worth lying down for!
5. Fill the Frame (When Appropriate)
When you want to show detail:
- Move in (without crowding the butterfly) until it fills most of the frame.
- Use this especially to highlight wing scales, eye structure, or antennae.
Filling the frame removes distractions and emphasises why butterflies are such incredible macro subjects.
 Filling the frame: Getting in close allows the Gatekeeper butterfly to dominate the image, really emphasizing its beautiful wing patterns, textures, and details.
6. Look for Leading Lines
Look for natural lines that point towards the butterfly, such as stems, blades of grass or leaf edges.
Position the butterfly so these lines guide the viewer’s eye into the frame and onto your subject, adding depth and a natural visual path.
You don’t need to use every trick at once. Pick one or two per shoot (rule of thirds + cleaner background, for example), and your butterfly photos will start to look much more deliberate, very quickly.
Be an Ethical Butterfly Photographer
Chasing the perfect shot never justifies stressing or harming your subject.
Butterflies are fragile, and so are their habitats. Your first priority is always the butterfly's wellbeing and the health of the habitat.
Here's how to photograph responsibly:
Approach Slowly & Calmly
Butterflies are highly sensitive to movement and vibration.
- Avoid sudden gestures or rushing towards them.
- Move slowly and predictably, pausing often.
- Try not to cast your shadow over them – that alone can make them fly.
If they keep flushing as you approach, you’re coming in too hard or too fast.
Maintain a Respectful Distance
Use your lens, not your feet, to get closer when you can.
Watch for behaviour changes: if a butterfly stops feeding, seems agitated, or repeatedly flies and nervously re-settles…it’s telling you you’re too close. Back off and give it space.
Never Handle, Touch or Trap
Do not touch a butterfly’s wings – you can easily damage the delicate scales they rely on for flight, insulation, and camouflage.
Never catch, trap or restrain a butterfly just to get a photo. If you can't get the shot without handling it, you don't get the shot.
Avoid Artificial Manipulation
Unethical practices include chilling butterflies (e.g. in containers or with cold sprays) or any other method used to force them to stay still.
These can harm the insect and disrupt its life cycle. Aim to photograph natural behaviour, not staged suffering.
Protect the Habitat
You’re not just visiting the butterfly – you’re walking through its entire world.
- Watch your footing: avoid trampling flowers, larval food plants, or nectar sources.
- Stick to paths where possible.
-
Don’t break vegetation to “clear a shot”.
Leave the area exactly as you found it: take nothing but pictures, leave nothing but carefully placed footprints.
The most rewarding butterfly photos show natural behaviour in an undisturbed setting.
Your patience and respect matter just as much as your camera skills — and they’re what ensure these insects are still there for the next person to enjoy.
Ultimately, the most rewarding butterfly photographs capture natural behaviour in an undisturbed setting.
Your patience and respect are just as important as your camera settings, ensuring these beautiful insects can continue to thrive for others to enjoy.
Capturing Butterfly Magic: Final Thoughts
Butterfly photography is a mix of technical skill, quiet observation, and yes, a bit of luck – and that’s what keeps it interesting.
To stack the odds in your favour, keep coming back to three pillars:
- Preparation – Learn basic behaviour, research likely locations, and pick the right times and conditions.
- Patience – Spend time simply watching, not chasing, and wait for those brief moments when everything lines up.
- Practice – Keep working on your settings and composition, so using the camera becomes second nature.
You will lose shots. Butterflies will fly off just as you focus. That happens to everyone.
Instead of fixating on the misses, treat each outing as:
- Time immersed in nature
- A chance to understand butterflies better
- Another step in sharpening your eye and technique
Combine preparation, presence, and persistence, and you’ll gradually build a body of images that capture their delicate, fleeting beauty – and share that with anyone who sees your photos.
Happy butterfly watching – and photographing.
Further Reading
Related Photography Tips
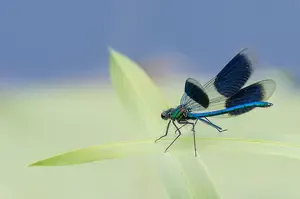
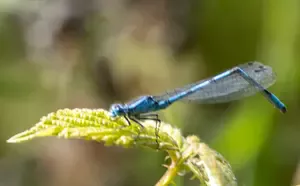
Photos of Dragonflies - During the summer I turn to taking photos of dragonflies and damselflies as there are fewer birds around.
How to Change Camera Settings - Learn how to adjust ISO, shutter speed, and aperture for stunning wildlife photography with a step-by-step guide.
Getting Started with Wildlife Photography - Learn about the right gear, techniques, and tips to capture stunning shots of wildlife, even as a beginner
Related Walks and Wildlife
Swallowtail Butterflies - Swallowtail butterflies in the Norfolk Broads attracted us back for a second year. This time I was lucky enough to photograph them!
Fermyn Woods Country Park - Fermyn Woods Country Park is an ideal place for a nature walk and is one of the few UK homes for the Purple Emperor butterfly.

I've spent over 30 years walking and photographing UK wildlife, with work featured in Canon EOS Magazine and a Wildlife Trusts calendar. I still learn something new on most outings.
This site is my field notebook full of photo tips, help on identifying what you see, and how to decide where to walk. About Me.
Step Behind the Wild Lens
Seasonal field notes from my wildlife walks: recent encounters, the story behind favourite photos, and simple, practical tips you can use on your next outing.
Explore More Nature Walks, Wildlife and Photo Tips
Camera Settings for Wildlife Photography: What to Set and When
Stop guessing your camera settings. A simple 3-step workflow helps you choose the right settings for any wildlife situation, from birds in flight to dusk.
How I Stopped Taking Boring Photos: My Guide to Low-Angle Photography
Feeling disappointed with your wildlife photos? This is the story of how I learned to use low-angle photography to go from boring shots to real connection.
Dragonfly Pictures: Beautiful Close-Up Photos & How to Take Yours
Close-up dragonfly and damselfly images from UK nature walks — chasers, darters, hawkers and demoiselles. Where to find them, plus photography tips.


Copyright © 2018- naturewalkswithcarol.com All rights reserved
Home. | About Me | Contact Me | Blog | Privacy Policy